• Skip to secondary menu
  • Skip to main content

Love Into Jars

A Smashbook "How To" Guide for Easily Mastering Canning Basics, Preserving Seasonal Flavors & Family Recipes

  • Home
  • Contests & Treasures
  • About the Author
  • Blog
  • Events
  • Samples
  • Shop

Blog

How to Use a Food Mill

May 5, 2018 by adomesticwildflower

A food mill is an incredibly versatile kitchen tool that I use all the time in canning applications. A food mill can be used many ways beyond canning, including pureeing super smooth mashed potatoes, baby food, and more. Read this post for how to select a food mill, how to clean a food mill, and how to use a food mill for canning success! 

A food mill is an incredibly versatile kitchen tool that I use all the time in canning applications. A food mill can be used many ways beyond canning, including pureeing super smooth mashed potatoes, baby food, and more. Read this post for how to select a food mill, how to clean a food mill, and how to use a food mill for canning success! 

This post contains affiliate links.

For canning recipes, the food mill is irreplaceable. Well, I suppose you could replace it, but it would be with a tool that takes longer, is harder to use, and isn’t as versatile.

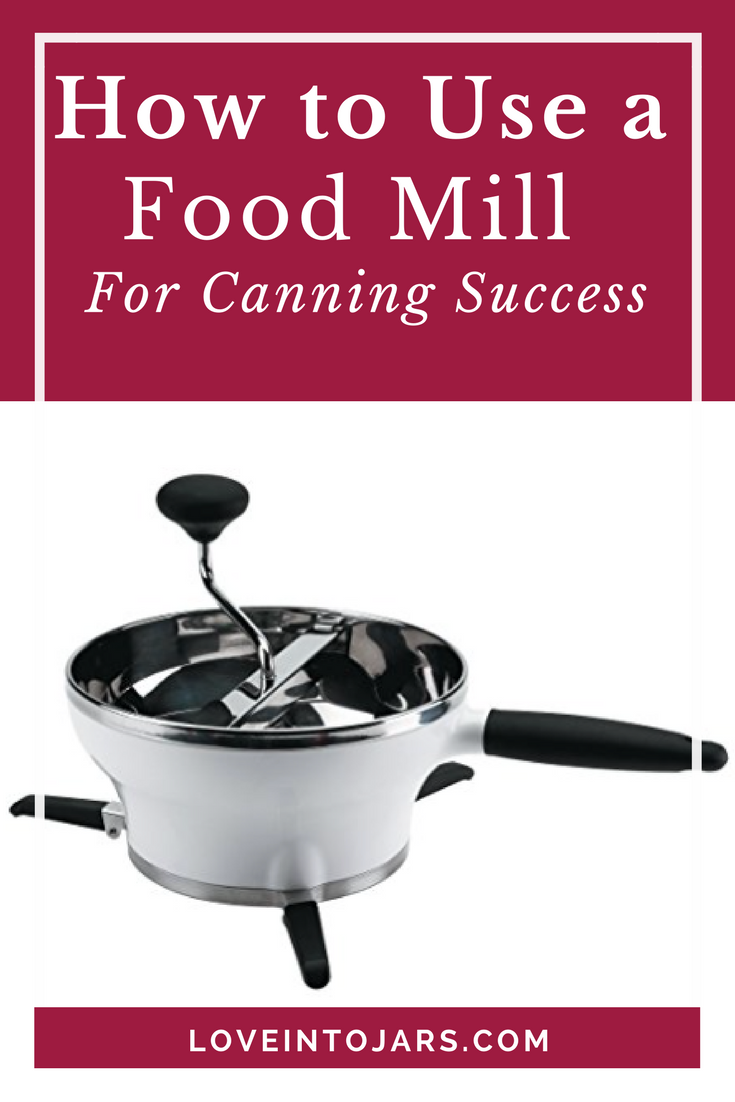
A food mill works by pressing the fruit or veggie against a plate with holes in it, much like a cheese grater. The food that falls through the holes is perfectly smooth puree and the refuse up top in the hopper is the skin, cores, seeds, and tough parts that you don’t want to eat. It’s magic, and you need one.

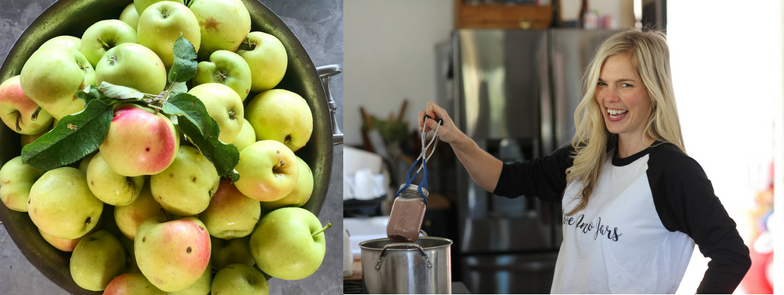
I choose the food mill to make jam that’s smooth and nearly seedless and perfect applesauce. It’s priceless for applesauce because I don’t have to peel or painstakingly core the apples before cooking them. It’s genius, and it saves a ton of time. I also use it for any recipe- canning or not- when I want a really smooth, fast result.

I really love that the food mill is a simple, non electric device. It is just 3 metal pieces that fit together easily (and come apart easily) and they won’t just decide to quit working one day the way an electric food processor might.

How to Clean A Food Mill

Scoop out the wet and slimy peels, skins, seeds, cores, etc from the hopper with a spatula, or if you are fearless mother (like yours truly!) with your hands. The refuse is compost gold. The stuff you can remove by hand can be rinsed out in the sink. Of all the things you clean when canning, clean your food mill first. Dried on skins are particularly difficult to clean from a food mill.

What type of food mill should I use?

There are indeed several types of food mills to choose from. I LOVE my Oxo brand food mill because it has grips on the legs, it is very easy to clean, and has 3 plates. I can make a super smooth, medium, or coarse puree. I definitely recommend choosing a food mill with different plate sizes.

There are a few all metal options that I haven’t used personally but look like they would be good quality. This stainless steel option from Weston interestingly has no legs which I think could be really nice because it could sit down into a bowl.  It also has 3 plates (a must) and would be easy to clean.

Old Fashioned Strainers

There are old fashioned strainers out there that are called Squeezo Strainers that essentially do the very same thing as the food mill but with a conical plate instead of a flat plate. If you tell any experienced canner that you want to work up 100 pounds of apples, they will almost surely tell you to use the old-style Squeezo (or similar brand) Strainer. This is the new version (that looks almost exactly like the old).

While they are made in America, which I love, they are expensive ($200!) and hard to clean (imagine getting into the elbow there!). You have to clamp them to a table or countertop which provides you with a sturdy workstation but sometimes isn’t as convenient. The hopper size of these older style mills is the same or even smaller (even though they are overall larger/taller than the Oxo food mills). To me, because they are bigger than a food mill, much more tedious to clean, and more expensive, the Oxo food mill is what I would recommend hands down every time.

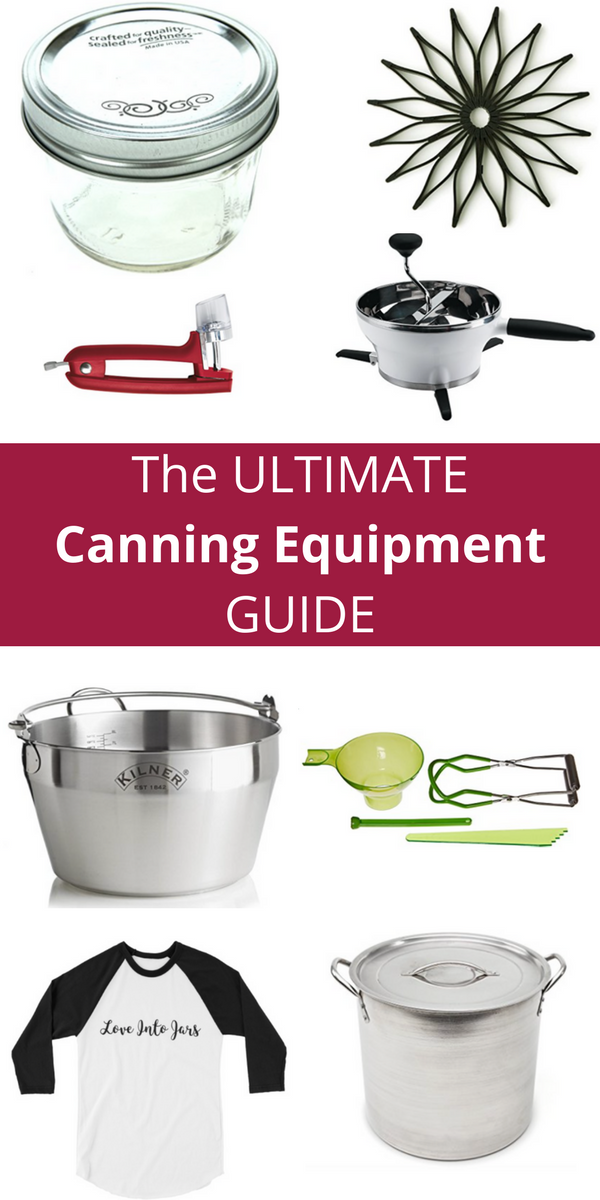
What other canning equipment are must-haves?

Be sure to check out this post for the ultimate guide to canning equipment. 


Filed Under: Instruction

Mason Jar Candles

March 2, 2018 by adomesticwildflower

The Only Thing In a Jar That I’ll Ever Recommend that You Can’t Eat: The Love Into Jars Mason Jar Candles

I know lots of you are canning curious, or canning fans from afar: You love the idea of canning, but haven’t dove in. Or, many of you can, and can well, but want to share some mason jar love with your friends and family who don’t know how to put love into jars …yet 😉

Love Into Jars Candles for Mason Jar Lovers | Mason Jar Candles | Clean burning, hand poured soy candles- farmhouse style, zinc lids, and beautifully scented!


That’s why I worked really hard with my friend Erin of Happy Candles to bring you a mason jar giftable that is beautiful, hand-poured, delightfully scented, and reminnicent of years gone by with the zinc topped lid and classic mason jar design.

Love Into Jars Candles for Mason Jar Lovers || Mason Jar Candles | Clean burning, hand poured soy candles- farmhouse style, zinc lids, and beautifully scented!

I wanted to create something that you can share with others that is canning…that’s not quite canning. Mason jars are a gateway drug to canning, and I’m all about bringing canning to everyone!


I met my friend Erin while demonstrating canning applesauce at the Portland, Oregon Williams Sonoma store. We became pals and stayed in touch via Instagram. She was busy building her handmade candle business and I was busy building my canning courses.

Love Into Jars Candles for Mason Jar Lovers | Mason Jar Candles | Clean burning, hand poured soy candles- farmhouse style, zinc lids, and beautifully scented!

She was my first choice when I realized I needed a treasure that you Love Into Jars fans could share with others and bring into your home and I’m so pleased she was able to collaborate with me.

Mason Jar Candles

The Love Into Jars candles are hand-poured in the beautiful Pacific Northwest, and contain no toxic, allergy-triggering paraffin. These soy candles are clean burning and the scent is called Happy for good reason.

Love Into Jars Candles for Mason Jar Lovers | Mason Jar Candles | Clean burning, hand poured soy candles- farmhouse style, zinc lids, and beautifully scented!

It’s a familiar scent at any Anthropology store, with the blends of tropical fruit and sugared citrus including oranges, lemon and lime as well as a hint of violet leaf, sweet Japanese quince, sun ripened cassis, sparkling pomelo, sun weathered driftwood and lightly mountain greens. I can’t say for sure that this will be our last candle that we collaborate on (in fact, Erin and I are already chatting about scent #2!) but I’m so HAPPY it is our first!


When you place your order, you’ll be ordering directly from Erin’s Happy Candle online store so that the candle gets shipped straightaway from her workshop.


Thank you so much for your support; I know you will love these candles and if you aren’t able to make a purchase today, I’d love it if you’d pin this blog post to Pinterest. That helps us out exponentially!

SaveSave

SaveSave

SaveSave

Filed Under: Product

Why You Need To Label Your Canning Jars

December 6, 2017 by adomesticwildflower

Why Would You Need To Label Your Canning Jars? This post will explain why you need labels, how long canned food lasts in the jar, how to get organized with labels and a canning log, and the importance of dating your canning jars. Read on for Why You Need to Label Your Canning Jars!

Why You Need to Label Your Canning Jars

Why You Should Label Your Canning Jars - This great article explains why you need to label your canning jars to be organized and for safety!

This post contains affiliate links.

Why would you need to label your canning jars? Tomato sauce looks a lot different than maple whiskey peaches, right? It sure does but tomato sauce made with zero jalapeno is a lot different than one made with one jalapeno- just ask my five year old. Raspberry jam, strawberry jam, cranberry lemon jam all start to look the same on the shelf after a while as the vibrant colors fade a tiny bit (which is completely natural and normal) which makes labeling necessary.

Why You Need To Label Your Canning Jars

The most important reason to why you need to label your canning jars is safety. The flange on canning lids slowly breaks down over time so even though the jars from 10 years ago that you find on granny’s shelf look ok, they aren’t probably safe to eat, even if they were a high acid recipe, because the seal has slowly deteriorated over time. That deterioration means that oxygen and/or spoilers have gotten in the jar and possibly set up shop inside on the salsa.

Labeling Your Canning Jars Helps with Organization

The better organized your canning bounty, the more efficiently you’ll can the following season. I suggest you download this free Canning Log to keep track of which canning recipes you love, which you didn’t and why.

Next season, when you look at your neatly labeled jars on the shelf, you’ll know why you still have several jars of salsa left (too spicy for the kids) or zero jars of raspberry jam left (kids loved it!). You’ll check the log to see how many batches you made, which recipe you used, any notes you made (how long it took you at the berry patch to pick that many berries, for example) and you’ll be canning smarter, not harder.

How Long Can You Keep Canned Food?

If you use Ball Brand Sure Tight new lids, their official recommendation is 18 months. It is suggested that the rings be removed, the jars be dried, and the jars be stored without rings so that should a seal fail, you’ll know it by the mini-volcano of mold erupting from the jar. (Note: I’ve never had this happen but this practice would be a wise one to adopt.) Drying the rings prevents them from rusting as well. Their regular, older model lids can be sealed safely for one year.

Canning jars should be stored out of direct light to protect vitamins, nutritional value and color. Color matters when serving picky kids and giving your canned items as gifts and I LOVE being able to give a beautiful jar of something I’ve preserved as a hostess gift. Do your best to store your nicely labeled jars out of sunlight.

How to Label Home Canned Food

Label home canned food with these beautiful, versatile, and giftable Love Into Jars Labels! They are 2 inches, which means they fit on either a regular mouth or a wide mouth lid, or on the side of the jar, and have space to write the contents and the date.

Why You Should Label Your Canning Jars - This great article explains why you need to label your canning jars to be organized and for safety!

Date Your Canning Jars

I used to think I’d remember when I canned what…and that’s a silly thing to think. One jar of strawberry kiwi lemonade concentrate looks exactly the same as another, and the date tells me when I canned it. I write just the month and year, never the day, because I honestly rarely know exactly what day it is since I had kids. So I’d write Pickled Pearl Onions 5/17 in my neatest handwriting on my Love Into Jars Labels, in a fine tip Sharpie or a regular ball point pen. I mention the neat handwriting & pen choice because after you open the jar, it serves as the lid for the refrigerator life of the jar as well…so my husband will open the jam to make his toast, potentially smearing peanut butter on the lid in the process…I may drip coffee on the lid when I’m rushing around getting the kids out the door on the way to school…this is real life, Wildflowers. You’ll want your Love Into Jars Label to be easily read for a while after the jar is opened too.

Why You Should Use Pretty Canning Labels

Yep, you can use a lame black sharpie on the top of your lids but then, when you want to grab a useful, beautiful gift of ranch-style salsa or strawberry rhubarb syrup to gift your lid doesn’t exactly match the effort inside, does it? The lovely label matches the labor of love inside and sets you up for gifting success.

Why You Should Label Your Canning Jars - This great article explains why you need to label your canning jars to be organized and for safety!


Having a pretty label ready to stick on your jars, or punch a hole in and string a cute ribbon, red and white baker’s string, or raffia through, means you won’t be tempted to try a last minute digital design project yourself. You have other things to do, right? Have these on hand instead 🙂

Why You Should Label Your Canning Jars - This great article explains why you need to label your canning jars to be organized and for safety!

I hope you see Why You Need to Label Your Canning Jars. You need labels for safety, for organization, and for sanity so you can tell the difference between similarly colored jars. Grab a sheet of the Love Into Jars Round Canning Labels and print them on your regular at home printer on regular paper OR on an Avery Label Template 22807. They fit on regular or wide mouth lids, or on the side of any jar. They have plenty of space to write, plus there’s room to punch a hole if you’d like to tie them on with a ribbon. They make gifting the love you’ve put into jars a touch more personalized. I know you and your jar recipients will love them!

SaveSave

SaveSaveSaveSave

Filed Under: Instruction

Ultimate Guide to Canning Equipment

November 9, 2017 by adomesticwildflower

Most people think that canning takes a TON of equipment, and that simply isn’t so. I hope to show you that there are only a few necessities, and a few more nice-to haves, in this ultimate guide to canning equipment. This Ultimate Guide to Canning Equipment will share all the canning equipment, used by beginners and experienced canners, with explanations anyone can understand.

This is the Ultimate Canning Equipment Guide and it shares the tools that make both beginners and experienced canners alike enjoy their hobby even more...gift one of these items and I bet they will share a jar with you!

This post contains affiliate links. That means that if you click through a link and make a purchase, I get a teeny tiny commission that doesn’t affect your purchase price at all. It’s a great way to support your favorite canning blogger. 

The first item that everyone thinks of when they think of canning is the big, speckled canning pot. My favorite tips for beginners is that they DON’T need that pot! What?! That’s right. You don’t need it.

Here’s what you need instead. You need a regular stockpot, or a pot that’s 3 inches taller than the tallest jar you plan to can. A pot that you could boil artichokes in is probably large enough. Think this type:

You don’t need the lid. Yeah, it’s helpful if you have it but it’s not absolutely necessary. THEN, you need this gem:

 This is a silicone trivet, they come in a bunch of cute colors, and they sit in the bottom of the regular stockpot and prevent the mason jars from rattling around and breaking. They are useful as a regular trivet, inexpensive, collapse for storage, and once I got one, I NEVER pulled the giant speckled canning pot out again.

The canning jars that are best for a beginning canner are wide mouth pint canning jars. You want to get wide mouth canning jars because they are easy to clean, by hand or in the dishwasher, they the most versatile size for the widest number of recipes, double as drinking classes, and you can freeze in them- just fill to the fill line on the top edge!

The next size that’s great for beginners is the wide mouth half pint. This size jar holds one measuring cup, so it’s just right for jam, applesauce, and for gifting the fruits of the canner’s labor.

Ultimate Guide to Canning Equipment continued: If the canner in your life has jars already , or maybe has canned a time or two, you should DEFINITELY get them several boxes of NEW lids. Lids can only be used ONE time through the canning process so a canner goes through them fairly quickly. They are a great gift item that a canner will always use in the same way a cooking enthusiast would always love a great bottle of olive oil. Here are the wide mouth lids that fit the jars above.

A beginning canner needs a set of tools that are usually sold together called a canning utensil kit.

Here’s my pro tip: That little wand that has a magnet at the end is called a lid lifter. They are used to lift lids out of simmering water before putting them on jars. If you’ve not canned much, or even if you’ve canned a lot, you might think that because that thing is sold in the kit, you need it, right? Wrong. You actually do NOT need to have that lid lifter and I wrote a blog post about why here but the short reason is that the lids haven’t had to be simmered since the 1960’s.

You NEED the tongs (called a jar lifter) and the funnel and you can get them separately through those links if you don’t want to purchase the kit, though I bet the kit is usually cheaper.

If you or someone dear to you wants to learn how to can, I cannot recommend enough that they join the Start Canning Course. This premium video course teaches STEP BY STEP exactly what to do when!

In Start Canning

I teach how to can:

  • Strawberry Jam
  • Strawberry Rhubarb Jam
  • Strawberry Syrup and Strawberry Butter
  • Tomato Sauce
  • Roasted Bell Peppers

Plus once you know how to make the basics, you can take your newfound skills and use them with different types of fruit and vegetables. It’s like having an entire farmer’s market on your pantry shelf!

Click here to learn more about Start Canning!

Best Home Canning Equipment For A Beginner Join the Start Canning Course to learn how to preserve healthy, homemade food in jars!

Next in the Ultimate Guide to Canning Equipment is the best food mill around. This food mill processes cooked foods and removes skins, seeds, peels, cores, and makes a super smooth sauce in one step. There’s no motor that will fail, or no junky plastic parts that will fail in a year or two; this is a well made, easy to clean tool that will last years and years.

Next in the list of Ultimate Guide to Canning Equipment is the beautiful preserving pan by Kilner. This is a pan for cooking jam, jellies, and more. It is heavy bottomed, and basically perfect for making preserves. It would last a lifetime, prevent jam from begin scorched, and allow it too cook low and slow, and thicken perfectly.

These jars may look “French Countryside” even though they are German in origin. An experienced canner would love to try their hand at canning with these Weck jars. They are a little different than standard Ball jars- the lid has a removable rubber flange and there’s no satisfying “pop” sound like when canning Ball lids & jars, but they work with the same processes and same recipes. They are beautiful and chic, as well.

They come in these many other shapes as well, which is so fun:

Next up in Best Home Canning Equipment for an Experienced Canner is the newest development in the canning world, the Steam Canner. These pots were approved for use by the USDA in 2015 and they make canning SO MUCH FASTER. They work exactly the same way as regular canning but they heat up much less water, so they are ready to go in 5 minutes instead of 30. If I could give every canner ONE gift, it would be one of these. I NEVER pull out my regular water bath canning pot anymore because they work so well and save so much time.

You don’t have to worry; they are NOT hard to use, and they aren’t at all like a pressure canner. I wrote a blog post on my sister site about them here called 29 Reasons You Should be Using a Steam Canner and there’s another great post I wrote called Steam Canning for Beginners.

Once a canner has canned a few seasons, they know that it would be really nice to keep track of which recipes they loved, which they didn’t, how many jars each recipe yielded, etc. I have a free Canning Log that’s beautiful and printable, and you can print it off right here to give to the canner in your life!

Ultimate Canning Equipment Guide Canning Log from Love Into Jars This canning log is free and adorable and this post lists all the gear you'd need for canning!

A steamer juicer is a contraption that your grandma probably used for canning grape juice. They are a really useful device and can be used for juicing elderberries, grapes, currants, and more. You don’t NEED one for canning, of course, but if juicing is something that is something you’d like to pursue, this is a wonderful tool. This one is the same brand as the steam canner that I love so I’d suspect it would be the very same high quality. I’m still steaming in my grandma’s steamer but if I had to ask Santa for one, this is the one I’d love:

This item is a lower price point, but if you had to can many pounds of cherries, you’d probably pay 10 times whatever a pitter cost to have it. A cherry pitter can save so much time and make the job of canning one of the most delicious fruit so much more fun. This kind is hand held, in the same brand as the food mill I’ve had and used for several years.

This cherry pitter is by Norpro, which is another brand I trust, and it suctions to the tabletop. I have the very similar model, that I got at a yard sale, but mine screws to the table ledge, and has scratched it more than once. I have not used this suction one but I bet it would work perfectly AND it wouldn’t damage your countertop. I like this style of model because it is really nice to have several cherries in the hopper so you can just bang-bang-bang pit them and then grab another handful.

This little strawberry huller is a great stocking stuffer if your canner preserves a lot of strawberries. This little guy does his one little job very, very well and if faced with a mountain of berries to preserve, the canner in your life would thank you.

This ladle is called a “strainer ladle” and they are wonderful for canners because they allow you to control how much liquid and how much solid (salsa+ tomato juice, for example) ends up in each jar that gets filled. It’s under $20 and I love mine.

This little jar is only 4 ounces, which means it’s perfect for the canner in you life to fill with hot sauce, chocolate cherry jam, or any other perfectly gift-able preserve and give as gifts.

And for the canning enthusiast, they need these super cute canning tee shirts.

Cutest canning shirt! From Love Into Jars!

As any experienced canner knows, Canic is the fear brought on by having tons of quickly ripening produce, but not enough time to can it all. It’s a very real thing, and the canner in your life needs this shirt.

Cutest canning enthusiast shirt! Chance from Love Into Jars!


Many canners have little Berry Picker helpers- these shirts are awesome for those littlest helpers whose motto usually is, “one for the basket, two for me.”

Cutest little berry picker tee shirt! For canning lovers from Love Into Jars!


And for hauling produce home from the farmer’s market, this Love Into Jars tote is perfect; and it always fits 🙂

Love Into Jars Tote | For Canning Lovers Cotton Tote Bag- so cute!

I hope this Ultimate Guide to Canning Equipment was helpful. If you are excited about canning, you’ll be thrilled to hear that I’m working on a book, Love into Jars and you can sign up for the waitlist right here; you’ll be the first to know when it is available for pre-order, get sneak peeks, and exclusive content!

Best Home Canning Equipment For A Beginner


Filed Under: Instruction

Canning Pumpkin Puree

October 15, 2017 by adomesticwildflower

Canning pumpkin seems like a lovely fall preserve, but it isn’t advised. This post will explain exactly why not, and will explain the safest way to preserve this fall flavor.

How to Can Pumpkin | This post will explain why you cannot can pumpkin puree at home! Canning Pumpkin Puree is not advised and this post will explain why!


This post may contain affiliate links.

This subject undoubtedly will bring about cries from readers who will say truthfully that their mother, grandmother, and great grandmother have been canning pumpkin puree for years and no one has ever gotten sick.


To them I will say that I am truly happy that they’ve never gotten botulism. That would be a real bummer to have diarrhea for a week, or worse, if you were elderly or had a compromised immune system.


One of my favorite college professors specialized in food, culture, and literature. She taught me a lot about how strongly people feel about their food and the love that goes into preparing it. I showed up to every single one of her classes at 8 am on Friday mornings in Taylor Hall of Chico State, even though Thursday nights were a very fun night indeed and I would have much rather slept in because she was such a great teacher. She shared example after example of how we eat what we eat, because of our mothers, because of our geography, and because of our husbands. It all made perfect sense to me, and her early morning lessons really ring true now that I’m blogging about canning.


I had a follower on social media recently reference the 1973 edition of the Better Homes and Gardens Canning Cookbook when she stated that she was following the directions therein to can pumpkin puree. I’m sure that book had great directions for doing so…44 years ago. I too love reading old cookbooks for inspiration and using recipes that my great grandma used- those old recipes make me feel genuinely connected to the women in my family and the recipes are usually dang good!


But here’s the problem. Canning science has improved in the last 44 years, and the latest recommendations by the USDA are that you CANNOT safely engage in canning pumpkin puree.


I could not, in good conscience, suggest to any reader, that they preserve pumpkin puree based on that science.


Pumpkin is a low acid vegetable. It is also very dense. Even in a pressure canner, which gets over 220 degrees, it is too dense for the heat to reliably penetrate the puree to kill any potential botulism spores.


Don’t worry, new canners; there are VERY FEW items that you cannot preserve in a home canning setup and this is one of them. Truly, very few. And, just like when you bake bread, you don’t have to understand why or how the bread rises. You DO have to follow the directions in order for it to work. Canning is the same. You just have to follow the directions.


All foods have an acid value, which I explain in detail in this blog post at my sister site, The Domestic Wildflower, and I suggest you check it out to learn more! 


You may, according to the USDA, can in a pressure canner cubed pumpkin, but I would consider this to be an intermediate canning activity. No freshmen allowed 😉


Cubed is required because a trusted recipe TESTED the size of the cubes (1 inch by 1 inch) and measured the heat inside those little cubes to be sure that it was hot enough inside to kill the spoilers that would make you uncomfortably sick.


It is for this reason that you cannot ever can spaghetti squash at all- it won’t hold a cube shape and becomes a mushy mass that the heat, again, can’t reliably penetrate. And, doesn’t that sound super unappetizing?


Cubed winter squash must be peeled first, which seems like a colossal chore to me personally, but it can be done.


So, what should you do if pumpkin is your favorite fall flavor and you want to preserve it?


It can be frozen, and I’d recommend these wide mouth pint jars for freezing. 


You can check this page on the USDA site for more detailed, and tested by science specifics on exactly what you can and cannot do with pumpkin.


To be clear, “puree” also refers to pumpkin butter, mash, mush, or anything that’s not a 1×1 inch chunk. No pumpkin baby food, no smooth pumpkin of any kind. No can do- pun definitely intended 😉

I have several easy, safe recipes that you should check out. Try the Strawberry Rhubarb Syrup, or the Ranch Style Salsa (very few ingredients- so easy!).

If this post was interesting to you, you’ll learn this type of thing and more in my new book, Love Into Jars and I hope you’ll sign up to the waitlist. That way, you’ll get sneak peeks, exclusive content, and be the first to know when the book is available for pre-order! 

SaveSaveSaveSave

SaveSave

SaveSave

Filed Under: Instruction

  • Go to page 1
  • Go to page 2
  • Go to Next Page »
Copyright © 2023 ·Lifestyle Pro · Genesis Framework by StudioPress